

Oral/Maxillofacial
Maxillary Expansion with Custom Palatal Guide: Precision and Comfort in Orthognathic Surgery
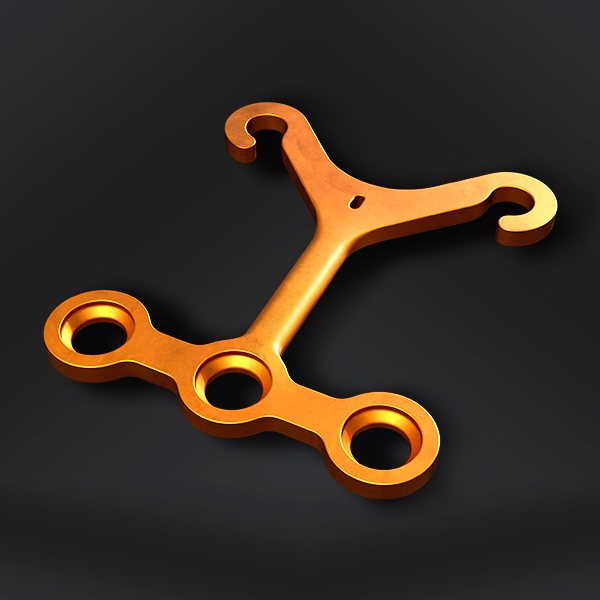
A Revolution in Maxillary Expansion: How Custom Palatal Guides Are Transforming Surgical Outcomes Maxillary expansion following Le Fort I osteotomy remains one of the greatest
Treatment
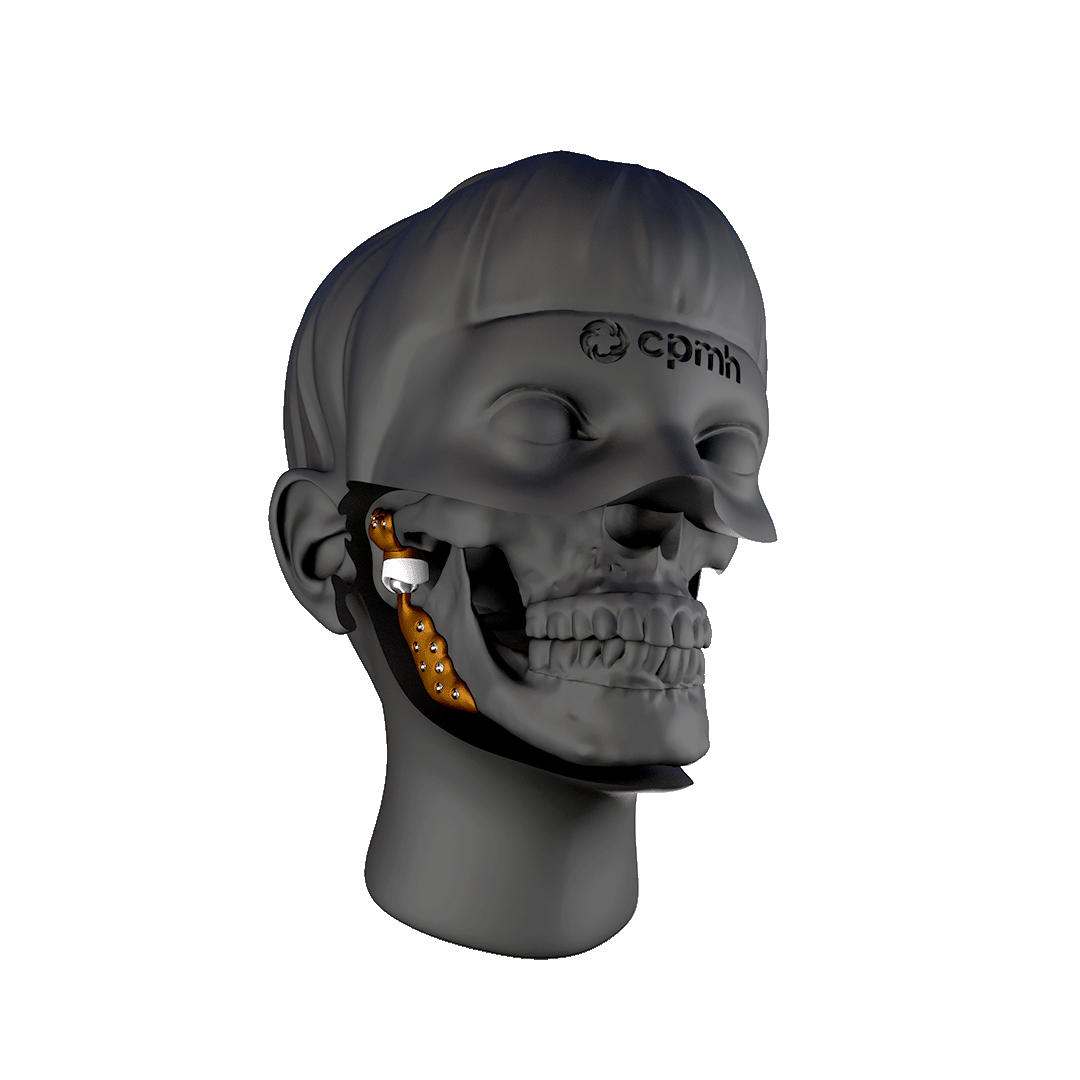
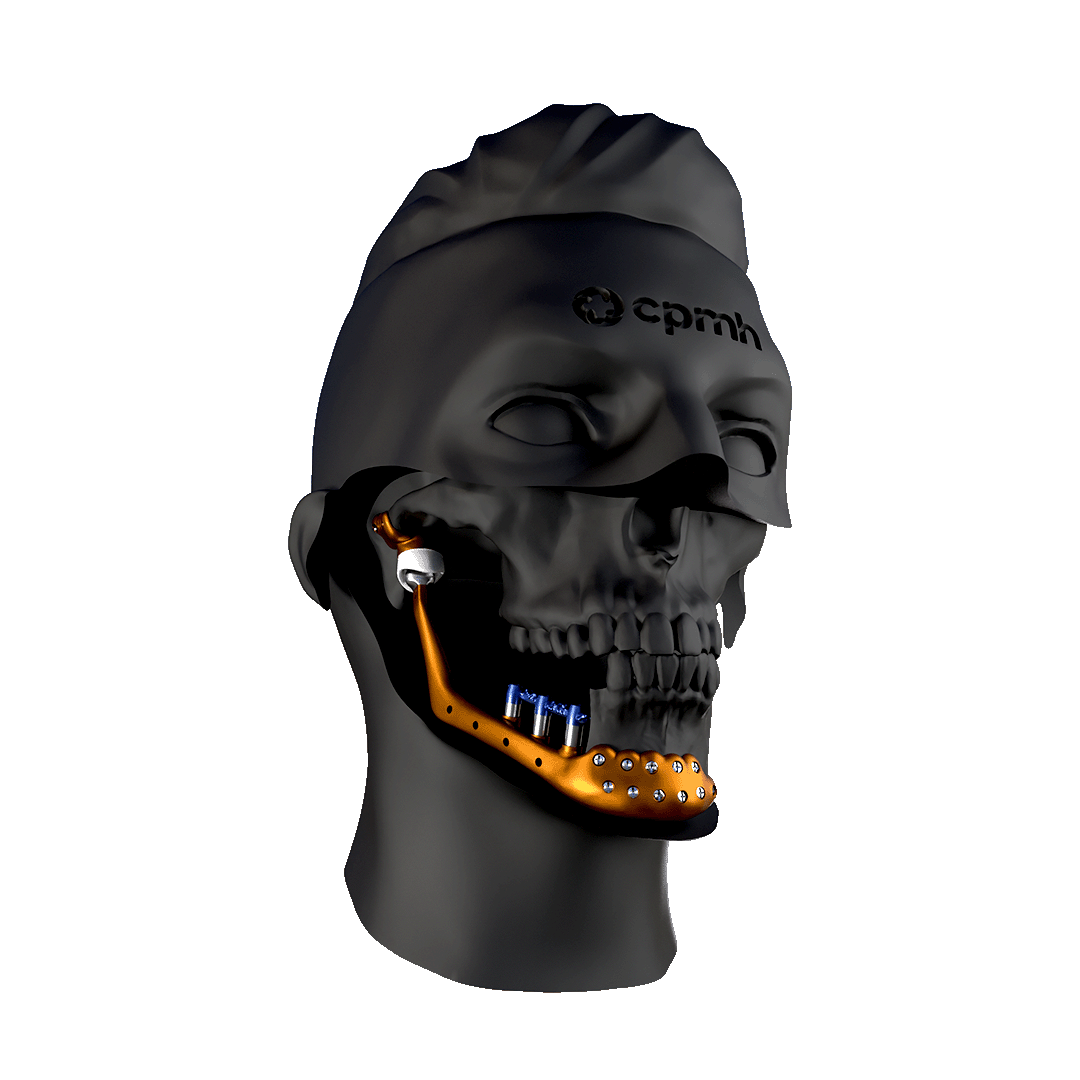
Introduction to Maxillary Rehabilitation and Custom Subperiosteal Implants
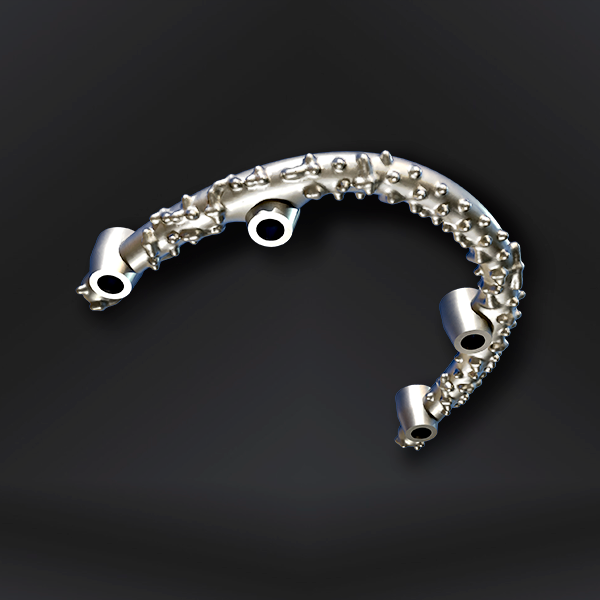
Maxillary rehabilitation is an essential field within oral and maxillofacial surgery, especially when dealing with patients who have suffered complications resulting from zygomatic implants. This
Treatment
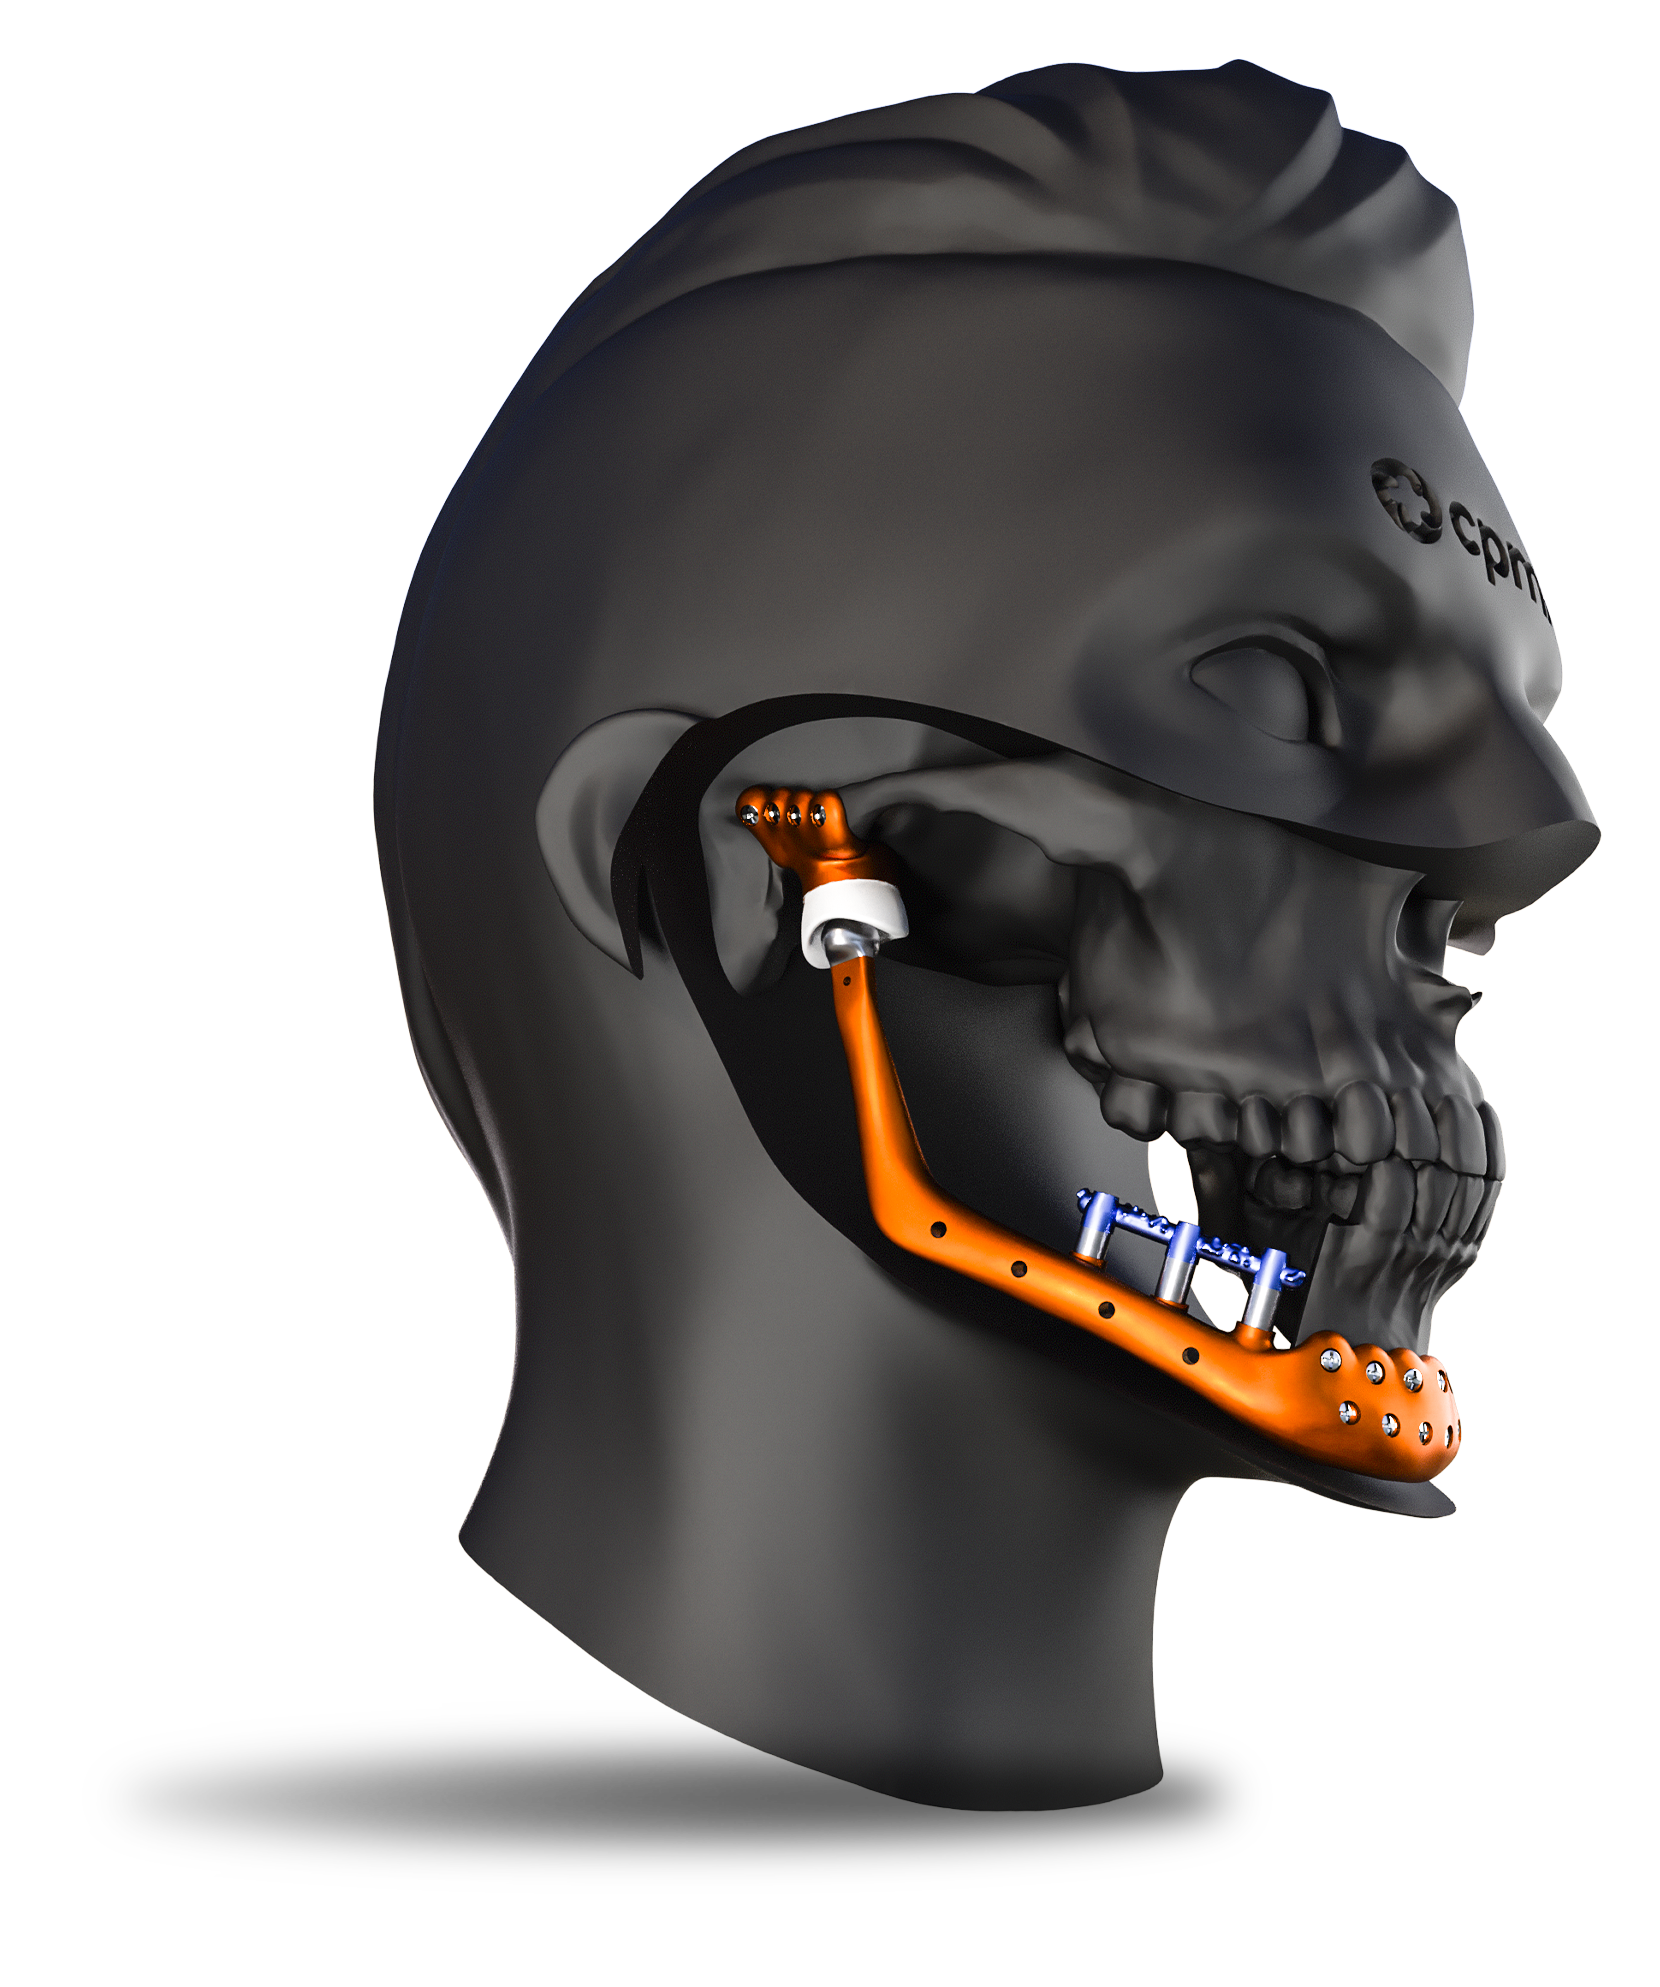
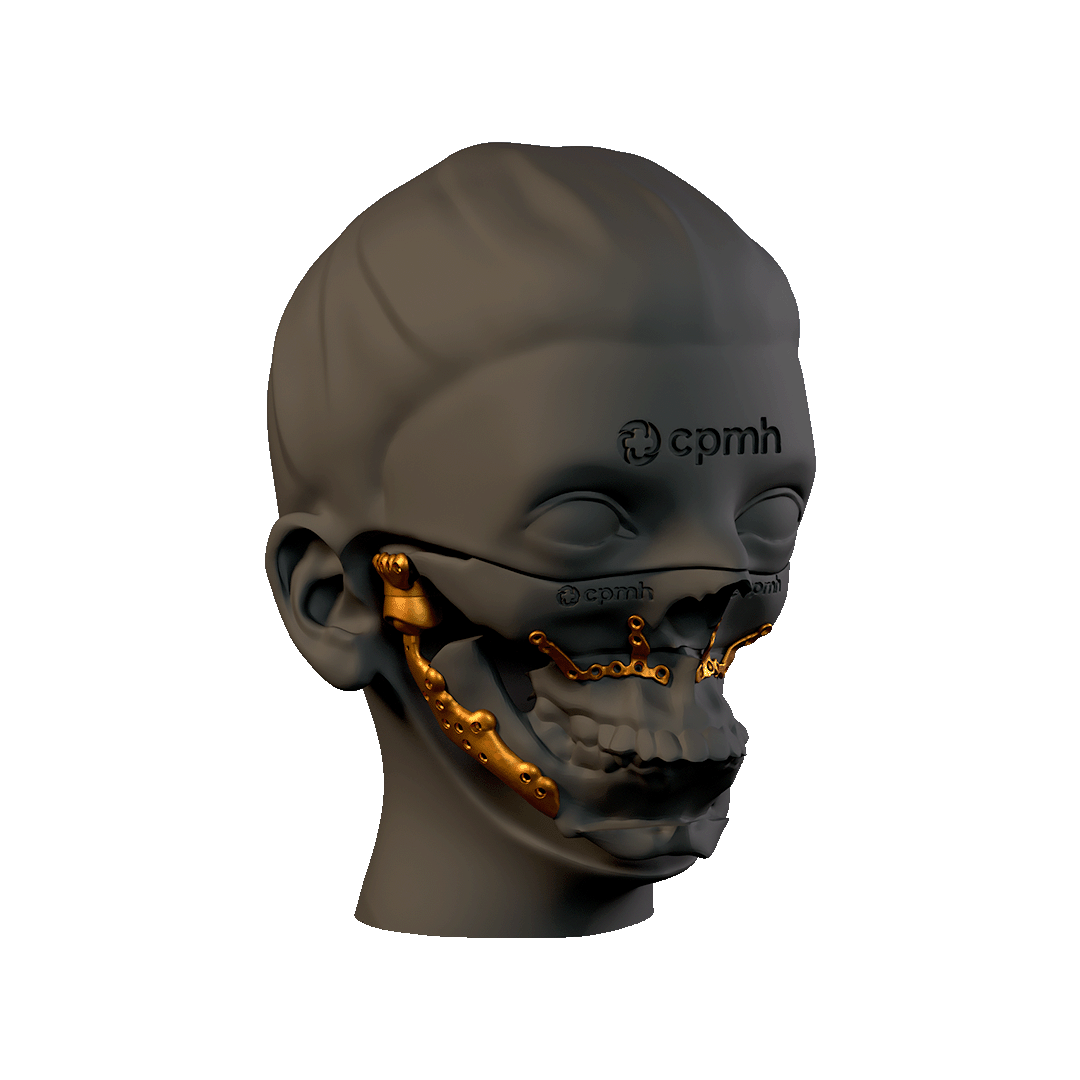
Rehabilitation of Atrophic Jaws with Customized Subperiosteal Implants: Advances and Perspectives in Modern Dentistry
Severe maxillary atrophy and edentulism have been recurring challenges in oral and maxillofacial dentistry, requiring increasingly innovative and personalized approaches for effective oral rehabilitation. A